Sellers Home Dining Chairs
Posted 6 April 2022
This is the introductory page for a paid video series. Want to watch more of this project? Select the best option below to get started.
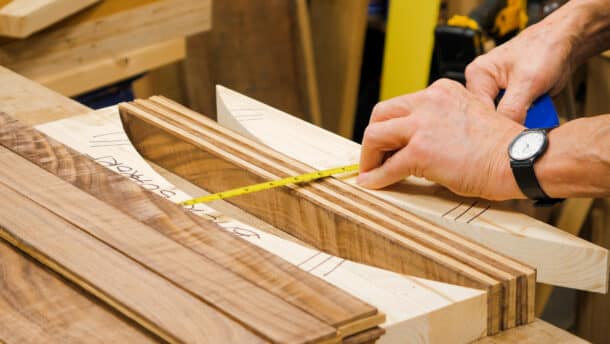
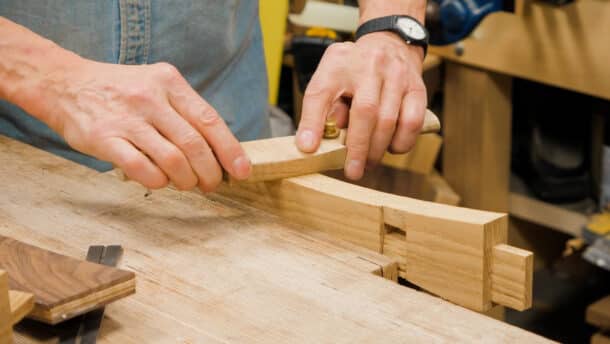
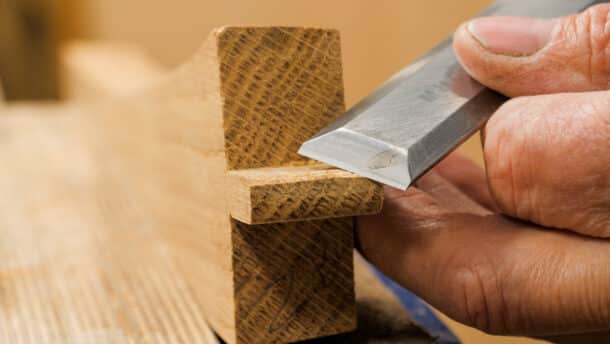
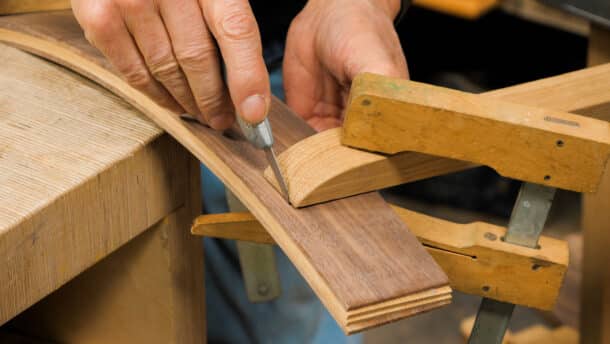
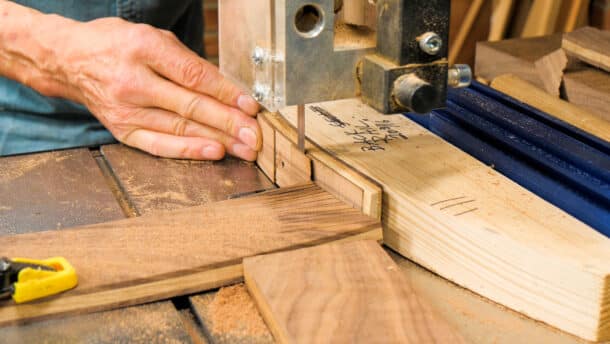
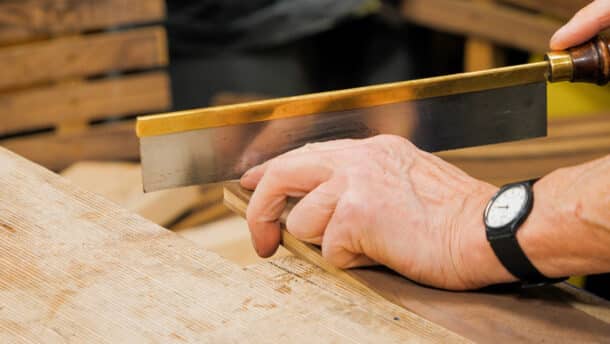
Something Paul has had planned for some time now, and here it is, a completed set of six dining chairs made from oak and walnut using traditional joinery, a combination of hand tools, and some bandsaw work for heavy cutting. Throughout this series, Paul employs lots of hand tool techniques and methods you might never have seen before. It’s not too big a project to make a single chair, and you can make them all at once, one at a time, or make them in pairs as you have the time and the energy. Paul feels quite proud of the outcome of an elegant design he came up with specifically for the Sellers’ home dining room series. We hope you enjoy watching and making it!
While Paul has been finessing the chair into its final form, the design has continued to develop. The technical drawings will follow once the shavings have settled.

I am very pleasantly surprised at the end result Paul. Watching the prototypes I felt the chair design was more akin to an outdoor setting. But after seeing the end result they are beautiful and I could imagine a lounge, dinning room full of this lighter brighter style of furniture. The finished complete set look great.
And as usual another gem of a joint to put in the knowledge bank.
ChrisB.
I think those chairs are absolutely stunning. One day I might be brave enough to try and make some!
In episode 9 are you using a 3/8″ Forstner bit for the plug recess in the slats?
The cut sheet has the back rail at 13 1/2 inch / 343 mm but the sketches have it at 12 3/4 / 314 mm. Which one is correct?
The geometry of this chair is quite tricky and Paul often leaves extra length in his cutting list which is then trimmed down for the final thing. Just because the overall length doesn’t match doesn’t necessarily mean it is incorrect as we often leave extra when we think it is particularly needed in the process. We didn’t follow everything that Chris said in his reply but he may well be correct about the extra length being needed because of the unusual shape of this component.
You are quite right about the incorrect conversion and we will make a correction shortly.
Apologies if it was impossible to follow. For my sins I studied maths long ago, hence its clear to me and only me i guess. On page 4 the picture of the back rail shows the two lengths 10 1/4″ and 11″. Allowing for the 1 1/4″ tenons, this implies the two lengths.
10 1/4″ + 1 1/4″ +1 1/4″ = 12 3/4″.
11 + 1 1/4″ + 1 1/4″ = 13 1 /2″
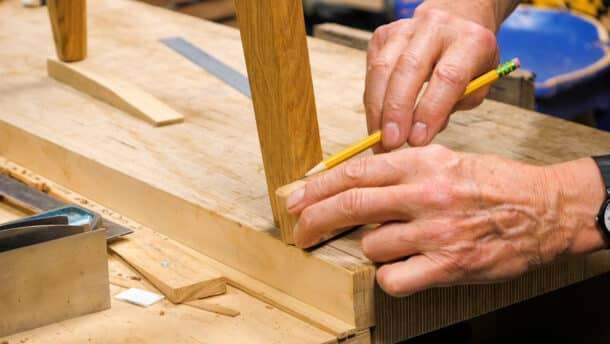
Could you help explain the leg dimensions? The legs should I think be 17″, 1″ haunch 1″ mortise. The diagram shows the legs as 6 13/16, 3/8″ haunch and 11/16″ mortise. Was there just some incorrect scaling factor used? i cannot resist a puzzle…
As you say this is a tricky piece, so the plans really help. Thank you.
Hi Chris,
Oohh, well spotted on the leg dimensions. I think the scale on that page was off somehow. We have fixed that today. Thanks for noticing.
Thank you Joseph. I know these plans are hard to do, but they are really valuable.
Chris
Also 12 3/4 inch is not 314 mm its 324. 12 3/8 is 314. I am a little worried about using any of the documents I find here given the first 5 minutes I have found more than 1 error in the first documentation I have looked at.
Sorry, i commented below but forgot to use reply to you.
chris
I am just about to attempt to make these, and saw your comment, so thank you. The leg dimension on pg seven as you note are all over the shop. With regards the back rail, it’s also misleading, but technically correct (ignoring metric conversion) The rough timber starts at 13 1/2″. The tenons are initially measured at 1 1/4″ as mentioned in the video (Not the incorrect drawing label of 7/8″) BUT, cut with an angled shoulder so the tenon to shoulder lengths are unequal, comparing inner and outer face of the rail. As a result of the angled shoulder, the inner and outer exposed rail lengths are 11 and 10 1/4″ ( according to page 4). Adding back tenon length of 1 1/4″ and assuming you angle the end of the tenon similar to shoulder angle gives the two seemingly confusing lengths of 13 1/2 and 12 3/4″ because the rail is now not rectangular but a trapezoid in cross section.
Yeah looks like my first chair will be a mock up :p. Which in all seriousness is not a bad thing. get all my bad joinery out of the way test the fit to my liking etc. Thankfully I am using reclaimed Jarrah if I wanst it would be a seriously expensive mock up